
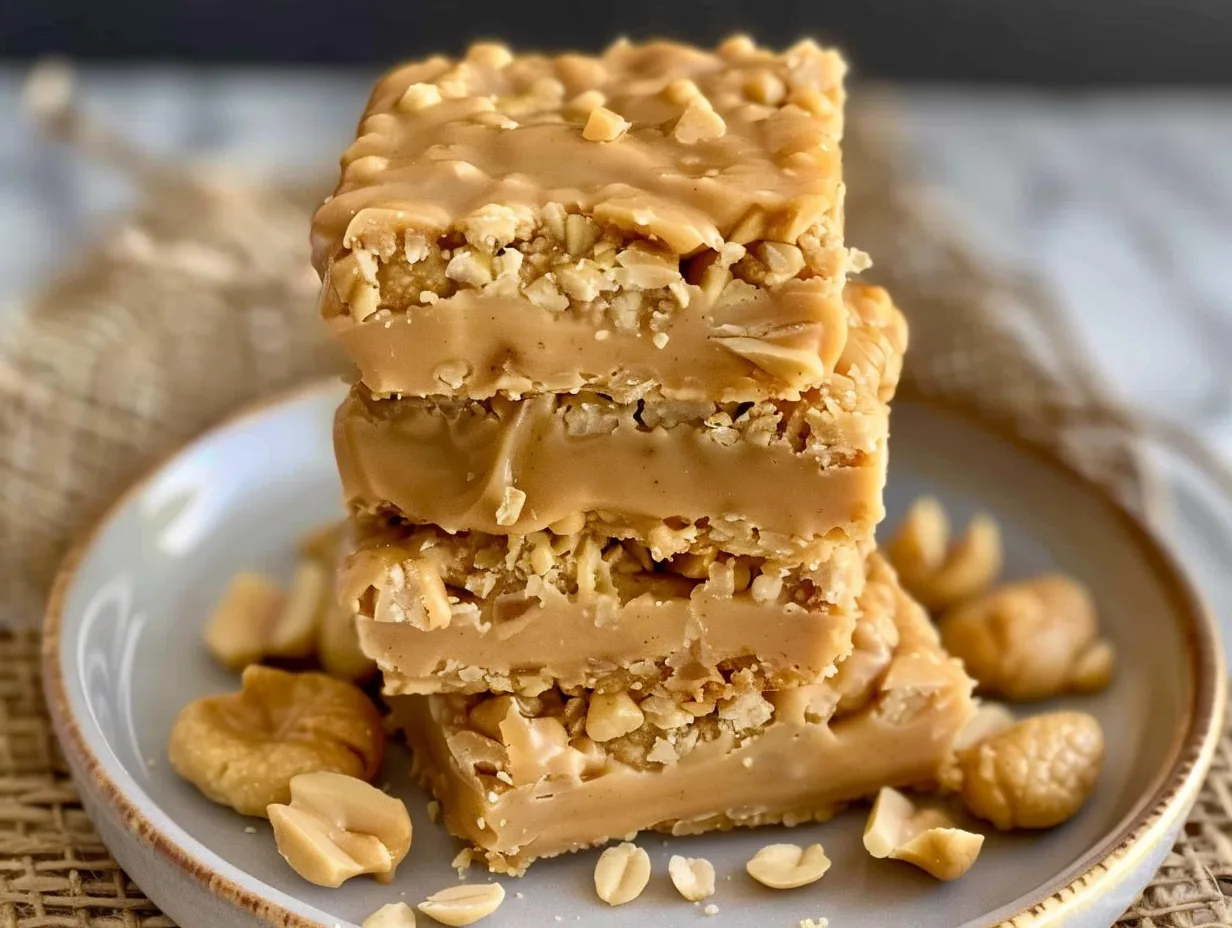
Peanut butter no bake cookies serve as the perfect quick and comforting dessert for busy families looking for a classic homemade snack. These simple treats combine creamy peanut butter with hearty oats for a chewy texture that satisfies every sweet tooth without requiring any oven time. You will appreciate how fast this recipe comes together on a hectic weeknight while still delivering that nostalgic taste everyone loves.
| Prep Time | Cook Time | Total Time | Servings | Difficulty | Cuisine |
|---|---|---|---|---|---|
| 5 mins | 10 mins | 45 mins | 24 cookies | Easy | American |
I remember making these with my own mother when I was a little girl standing on a wooden stool in our kitchen. There is something truly magical about the smell of boiling sugar and butter mingling with creamy peanut butter in the air. On those long afternoons when the kids are bouncing off the walls or homework feels endless, this recipe provides a moment of calm. It is a reliable comfort food that bridges the gap between generations, ensuring that even the most reluctant little helpers are excited to scoop the mixture onto the wax paper. You never have to worry about overheating the kitchen or waiting forever for a preheated oven to get to work.
Why my family loves this recipe
- The perfect balance of salty and sweet makes them impossible to stop eating after just one bite.
- Everyone feels like a master baker because these cookies are impossible to mess up with a little patience.
- These treats provide a high-energy snack that keeps kids satisfied during long afternoons of play or extracurricular activities.
- They serve as a beautiful reminder of slow-paced family afternoons spent laughing and sharing stories around the kitchen table.
Ingredients
You likely have most of these pantry staples already waiting in your kitchen cabinets. Having high-quality ingredients ensures the best texture and flavor for your finished cookies.
| Quantity | Ingredient | Notes |
|---|---|---|
| 2 cups | Granulated sugar | Do not use substitutes for best results |
| 1/2 cup | Milk | Whole milk provides the best creaminess |
| 8 tbsp | Unsalted butter | Ensure it is real butter for stability |
| 3 cups | Old fashioned oats | Avoid quick oats for proper texture |
| 1 cup | Creamy peanut butter | Standard commercial brands work best here |
| 1 tbsp | Vanilla extract | Pure extract adds the best aroma |
How to make it
Following the process carefully ensures that your cookies set up perfectly every single time you make them.
Phase One: Preparing the Base
- Line two large baking sheets with wax paper to ensure easy cleanup and prevent sticking.
- Combine the granulated sugar, milk, and unsalted butter in a large heavy-bottomed saucepan over medium heat.
- Stir the mixture consistently while bringing it to a roaring, foamy boil to ensure the sugar dissolves completely.
- Maintain a continuous, vigorous boil for exactly one minute while continuing to stir, as this is crucial for the set.
Phase Two: Mixing and Cooling
- Remove the saucepan from the heat source immediately after the one-minute boil finishes.
- Stir in the old-fashioned oats, creamy peanut butter, and vanilla extract until the mixture is fully incorporated.
- Scoop rounded portions of the mixture onto your prepared wax paper using a large spoon or a cookie scoop.
- Allow the cookies to cool completely at room temperature until they are firm enough to handle.
Mom tips & hacks
Meal prepping these cookies is a total game changer for the busy school week ahead. If you want to keep them on hand for quick lunchbox additions, place the cooled cookies in a single layer in an airtight container or a freezer-safe bag. They freeze beautifully for up to three months, meaning you always have a hidden stash of homemade goodness ready for surprise school events or sudden cravings. For picky eaters who might not love the texture of oats, you can pulse the oats briefly in a food processor before starting, which creates a smoother, more uniform bite that mimics a classic candy texture. This extra step takes only seconds but often wins over the most skeptical little ones who are sensitive to varied food textures.
Easy variations
Experimenting with this base recipe allows you to tailor the flavors to your family’s specific preferences or dietary needs. For a protein-packed version, you can stir in a quarter cup of hemp seeds or ground flaxseed during the mixing phase without altering the final texture. If you want to lean into the indulgence, feel free to fold in a half cup of mini chocolate chips once the mixture has cooled slightly, or drizzle a little bit of melted dark chocolate over the top once the cookies are set on the wax paper. For those avoiding dairy, you can easily swap the dairy milk for a thick oat milk and ensure your butter alternative is a high-fat plant-based variety. These small tweaks make the recipe truly versatile for any home kitchen.
What to serve with it
Serving these cookies is all about creating a cozy atmosphere that encourages sitting down and slowing down. They pair naturally with a cold glass of milk, which perfectly complements the rich and salty notes of the peanut butter. If you are hosting a casual afternoon playdate, serve these alongside fresh fruit slices like apples or strawberries to provide a crisp contrast to the dense, chewy cookie. For an adult-friendly dessert board, place these cookies next to a selection of mild cheeses, some salty almonds, and a hot pot of herbal tea. The simple nature of the cookie means it holds its own against more complex flavor profiles, making it a reliable choice for any casual gathering or a quiet solo treat after the kids have finally fallen asleep.
Storage & leftovers
Storing your cookies properly ensures they stay fresh and delicious for the entire week. Keep them in an airtight container at room temperature in a cool, dry spot, and they will stay perfect for up to five days. If your kitchen tends to be warm, you can store them in the refrigerator to keep them firm, though they may lose a bit of their signature chewiness. For longer-term storage, the freezer is your best friend. Wrap the container well to prevent freezer burn, and when you are ready to enjoy one, simply pull it out of the freezer for five minutes to let it come to room temperature. This makes for an incredibly easy treat that is ready whenever a sudden need for something sweet hits, saving you a trip to the store.
FAQ
Can I use natural peanut butter for this recipe?
Natural peanut butter often separates, which can prevent the cookies from setting properly. Use a shelf-stable commercial creamy peanut butter to ensure the consistency remains thick and holds the oats together.
How do I know if I boiled the sugar mixture long enough?
You must reach a full rolling boil before starting your one-minute timer to ensure the sugar reaches the correct temperature. If the mixture is not boiling vigorously while you stir, the cookies will remain too soft and won’t set up.
Why did my cookies turn out dry and crumbly?
Dry cookies often result from boiling the sugar mixture for longer than the instructed sixty seconds. Stick strictly to the one-minute timer to keep the sugar and butter syrup at the perfect hydration level.
Can I substitute quick oats for old-fashioned oats?
Old-fashioned oats provide the structural integrity and chewiness needed for these cookies to hold their shape. Quick oats may absorb the liquid too rapidly, leading to a mushy texture rather than the desired firm cookie.
How do I prevent the cookies from sticking to the wax paper?
Ensure you use genuine wax paper or high-quality parchment paper for the best results. If you are in a pinch, a light spritz of non-stick cooking spray on the paper will help release the cookies easily once they cool.
Conclusion
There is nothing quite like the comfort of a homemade treat that brings the whole family together without a complicated process. These peanut butter no bake cookies represent everything a busy mom needs: speed, simple ingredients, and a taste that never goes out of style. Whether you are whipping these up for an after-school snack, a weekend reward, or a lunchbox surprise, they are bound to become a staple in your home. I encourage you to set aside a few minutes this week to make a batch, fill your kitchen with that warm, sweet aroma, and share a few moments of joy with your favorite people. Once you experience how easy it is to create such a delicious, chewy, and satisfying snack from scratch, you will find yourself reaching for this recipe time and time again. Happy snacking and enjoy every single bite.
Print
Classic Peanut Butter No Bake Cookies
- Total Time: 45
- Yield: 24 cookies
- Diet: Vegetarian
Description
These peanut butter no bake cookies are the ultimate family treat, offering a perfect combination of creamy peanut butter and hearty oats. They are a quick, comforting, and nostalgic dessert that requires no oven time, making them an ideal project for busy families. With a satisfying chewy texture and a delicious balance of salty and sweet, these cookies are a reliable pantry-staple snack that brings generations together around the kitchen table.
Ingredients
2 cups granulated sugar
1/2 cup whole milk
8 tbsp unsalted butter
3 cups old fashioned oats
1 cup creamy peanut butter
1 tbsp pure vanilla extract
Instructions
In a medium saucepan, combine the sugar, milk, and unsalted butter over medium heat.
Bring the mixture to a full rolling boil and let it boil for exactly 60 seconds, stirring occasionally.
Remove the saucepan from the heat and stir in the creamy peanut butter and vanilla extract until smooth.
Add the old fashioned oats to the mixture and stir until they are thoroughly coated.
Using a spoon, drop rounded portions of the mixture onto wax paper or parchment paper.
Let the cookies cool and set at room temperature for about 30-40 minutes before serving.
Notes
Ensure the mixture reaches a full rolling boil for exactly one minute to guarantee the cookies set properly. Using standard commercial peanut butter works better than natural varieties for texture stability. Store in an airtight container at room temperature for up to a week.
- Prep Time: 5
- Cook Time: 10
- Category: Desserts & Sweets
- Method: Stovetop
- Cuisine: American