
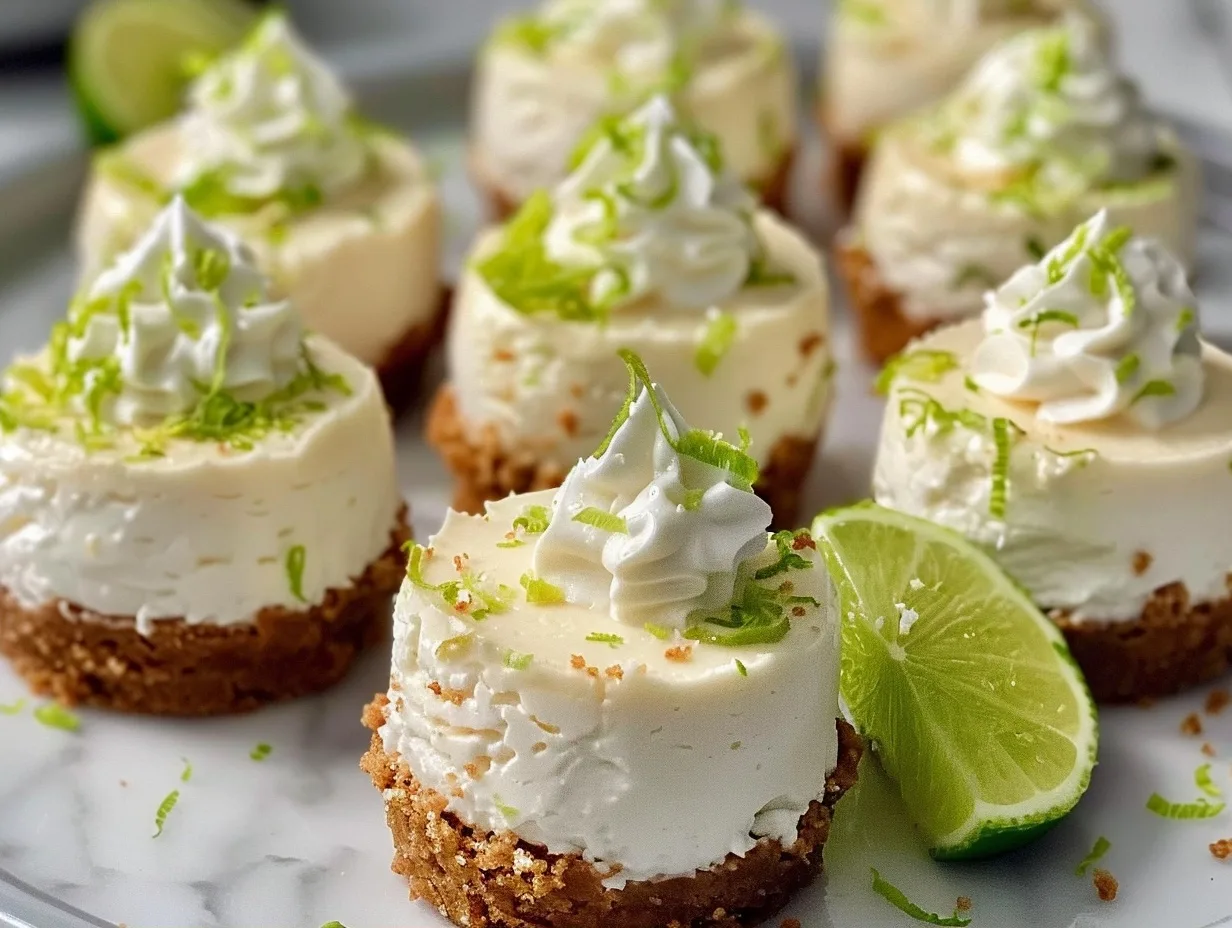
Picture this: A warm summer evening, the gentle hum of cicadas, and the pure joy of biting into something utterly delightful. That’s the moment these No Bake Mini Key Lime Cheesecakes are made for. They’re tiny pockets of pure sunshine, bursting with that signature tangy-sweet key lime flavor we all adore.
There’s something magical about a no-bake dessert, isn’t there? It feels like a little bit of culinary witchcraft, transforming simple ingredients into something truly special without even turning on the oven. And when that dessert is a mini cheesecake, perfectly portioned and bursting with bright, zesty key lime goodness? Well, that’s just pure bliss.
Each little bite delivers a creamy, dreamy cheesecake filling, balanced beautifully by the vibrant, tart punch of key lime. It all sits atop a buttery, crumbly graham cracker crust that provides the perfect textural contrast. They’re elegant enough for a party, yet so incredibly simple to make that they’re perfect for a weeknight treat, too. Get ready to fall head over heels for these little gems.
Why You’ll Absolutely Adore These No Bake Mini Key Lime Cheesecakes
If you’re looking for a dessert that ticks all the boxes, this is it. These mini cheesecakes are incredibly versatile and always a crowd-pleaser. Let’s dive into why they’ll become a go-to favorite in your kitchen rotation.
- Effortlessly Easy: Seriously, no oven required! Your biggest challenge will be waiting for them to chill.
- Perfect Portions: Mini cheesecakes mean built-in portion control – though you might find yourself reaching for a second (or third!).
- Bright & Zesty Flavor: The key lime offers a refreshing tang that cuts through the richness, making them incredibly addictive.
- Make-Ahead Marvel: These are perfect for preparing in advance, freeing you up to enjoy your guests or relax.
- Customizable Cuteness: Easily adaptable with different crusts or garnishes to suit any occasion.
- Budget-Friendly Bliss: Simple ingredients mean you can whip up a batch without breaking the bank.
- Restaurant-Quality at Home: Everyone will think you slaved away, but you’ll know the delicious secret to their simplicity.
Recipe Quick Facts
Let’s get down to the essentials. Knowing the timings and servings helps immensely with planning your dessert masterpiece. Here’s a quick look at what you need to know for these charming mini key lime cheesecakes.
| Prep Time: | 20 minutes |
|---|---|
| Chill Time: | 4 hours (minimum) |
| Total Time: | 4 hours 20 minutes |
| Servings: | 12 mini cheesecakes |
| Difficulty Level: | Easy |
Gather Your Ingredients for No Bake Mini Key Lime Cheesecakes
The magic behind these no-bake mini key lime cheesecakes lies in their simple, yet potent, ingredients. Each element plays a crucial role in creating that perfect tangy-sweet, creamy, and crumbly bite. Let’s walk through what you’ll need and why each component is so important.
For the Graham Cracker Crust:
- Graham Cracker Crumbs: You’ll need about 1 ½ cups of finely crushed graham crackers. This forms the foundation of our mini cheesecakes, providing that essential satisfying crunch. If you need a gluten-free option, simply swap these for your favorite gluten-free graham crackers or even crushed vanilla wafers. Whichever you choose, make sure they’re finely ground for the best texture.
- Granulated Sugar: Just 2 tablespoons of granulated sugar are needed here. This adds a subtle sweetness that balances the tart lime and enhances the overall flavor profile of the crust. It’s a small amount, but it makes a difference!
- Melted Unsalted Butter: Roughly 6 tablespoons of melted unsalted butter act as the binder for our crust. This is what holds those lovely crumbs together, creating a compact base that’s firm enough to hold the creamy filling. Ensure it’s fully melted for even distribution.
For the Creamy Key Lime Filling:
- Full-Fat Cream Cheese: Two 8-ounce blocks of full-fat cream cheese, softened to room temperature, are the heart of our cheesecake filling. Full-fat cream cheese yields the richest, creamiest texture that is simply unparalleled. Make sure it’s truly softened; this is key to achieving a smooth, lump-free filling. If you prefer a lighter version, you can use light cream cheese, but the texture might be slightly less rich.
- Powdered Sugar: About 1 cup of powdered sugar (also known as confectioners’ sugar or icing sugar) gives our filling its signature smooth sweetness. It dissolves beautifully, creating a velvety texture without any grittiness. Sift it if you notice any clumps for an extra-smooth finish.
- Key Lime Juice: Here’s where the magic happens! You’ll need about ½ cup of key lime juice. For the most vibrant, authentic flavor, fresh is always best. Squeezing your own key limes will result in a brighter, more intense zestiness. However, good quality bottled key lime juice can certainly be used in a pinch. This ingredient provides that essential tartness that balances the sweetness and richness.
- Key Lime Zest: Zesting 2-3 key limes will give you about 1 tablespoon of zest. Don’t skip this! While the juice provides the tang, the zest offers an incredible aromatic quality and an extra layer of complex lime flavor that fresh ingredients simply can’t replicate. It’s like bottling sunshine!
- Vanilla Extract: A teaspoon of pure vanilla extract enhances all the other flavors and adds a subtle warmth to the filling. It rounds out the bright lime notes beautifully. A good quality pure vanilla extract will make a noticeable difference.
- Whipped Topping: Approximately 8 ounces of stabilized whipped topping (like Cool Whip), thawed, is what makes this cheesecake no-bake and wonderfully airy. It lightens the dense cream cheese mixture, creating a fluffy, mousse-like consistency. If you prefer homemade, you can substitute with 1 cup of heavy cream whipped to stiff peaks with 2 tablespoons of powdered sugar.
For Garnish (Optional but Recommended!):
- Extra Whipped Topping: For piping decorative swirls or dollops on top.
- More Key Lime Zest: A final sprinkle for visual appeal and an extra burst of fresh lime aroma.
- Thin Lime Slices: For a beautiful, elegant finish.
Essential Kitchen Tools You’ll Need
To bring these delightful No-Bake Mini Key Lime Cheesecakes to life, you won’t need a professional arsenal, just a few everyday kitchen essentials. Having these ready will make the process smooth and enjoyable.
- Standard 12-cup muffin tin
- Cupcake liners (paper or silicone)
- Medium mixing bowl (for crust)
- Large mixing bowl (for filling)
- Electric mixer (handheld or stand mixer)
- Whisk or spatula
- Measuring cups and spoons
- Spoon or small tamper for pressing crusts
- Spatula for smoothing filling
- Microplane or zester (for lime zest)
How to Make No-Bake Mini Key Lime Cheesecakes: A Step-by-Step Guide
Creating these charming mini cheesecakes is a breeze, and the results are wonderfully rewarding. Follow these simple steps, and you’ll be enjoying that zesty, creamy goodness in no time. Each step is designed to be foolproof, even for beginner bakers!
Step 1: Prepare Your Muffin Tin and Liners
Begin by taking your standard 12-cup muffin tin. Line each cup with a paper or silicone cupcake liner. This is crucial for easy removal of your finished cheesecakes and keeps them looking picture-perfect. Plus, the colorful liners just add a festive touch, don’t you think? Gently press the liners down so they sit snugly in the tin.
Step 2: Craft the Graham Cracker Crust
In a medium bowl, combine the graham cracker crumbs and the granulated sugar. Give them a quick whisk to distribute the sugar evenly. Now, pour in the melted unsalted butter. Stir everything together with a fork or spatula until all the crumbs are moistened and the mixture holds together when you squeeze it – it should resemble damp sand. If it seems too dry, you can add another teaspoon of butter.
Step 3: Press the Crust into the Liners
Scoop about 2 tablespoons of the graham cracker mixture into each prepared cupcake liner. Using the bottom of a small glass, a measuring cup, or even your fingers, press the crumbs down firmly and evenly onto the bottom of each liner. You want a nice, compact layer. This sturdy base is essential for holding the creamy filling.
Step 4: Create the Creamy Cheesecake Filling
Grab your large mixing bowl. Add the softened cream cheese and beat it with your electric mixer on medium-high speed for about 2 minutes. You want it incredibly smooth and creamy, with absolutely no lumps. This smooth base is vital for a luscious final texture. Gradually add the sifted powdered sugar, mixing on low speed at first, then increasing to medium-high. Beat for another 1-2 minutes until the mixture is light, fluffy, and completely smooth.
Step 5: Fold in the Key Lime Goodness
Now it’s time to infuse that bright, zesty flavor! Pour in the key lime juice and add the key lime zest. Drizzle in the pure vanilla extract. Mix on low speed until just combined. Be careful not to overmix at this stage. Then, gently fold in the thawed whipped topping using a spatula. Use an upward, folding motion, as if you’re incorporating air. Continue just until no streaks of cream cheese remain and the mixture is uniform and airy. This technique ensures that light, mousse-like texture we’re aiming for.
Step 6: Fill the Muffin Cups
Carefully spoon the luscious key lime cheesecake filling over the graham cracker crusts in each muffin liner. Fill them generously, aiming for a smooth, even surface. You can use the back of a spoon or a small offset spatula to smooth the tops. Each one should look like a perfect little cloud of creamy delight.
Step 7: Chill Until Firm
This is where patience truly pays off! Place the filled muffin tin into the refrigerator. Let the cheesecakes chill for at least 4 hours. For the best, firmest set and most developed flavor, chilling them overnight is ideal. You’ll know they’re ready when the filling is completely firm to the touch and springs back slightly.
Step 8: Garnish and Serve with Flair!
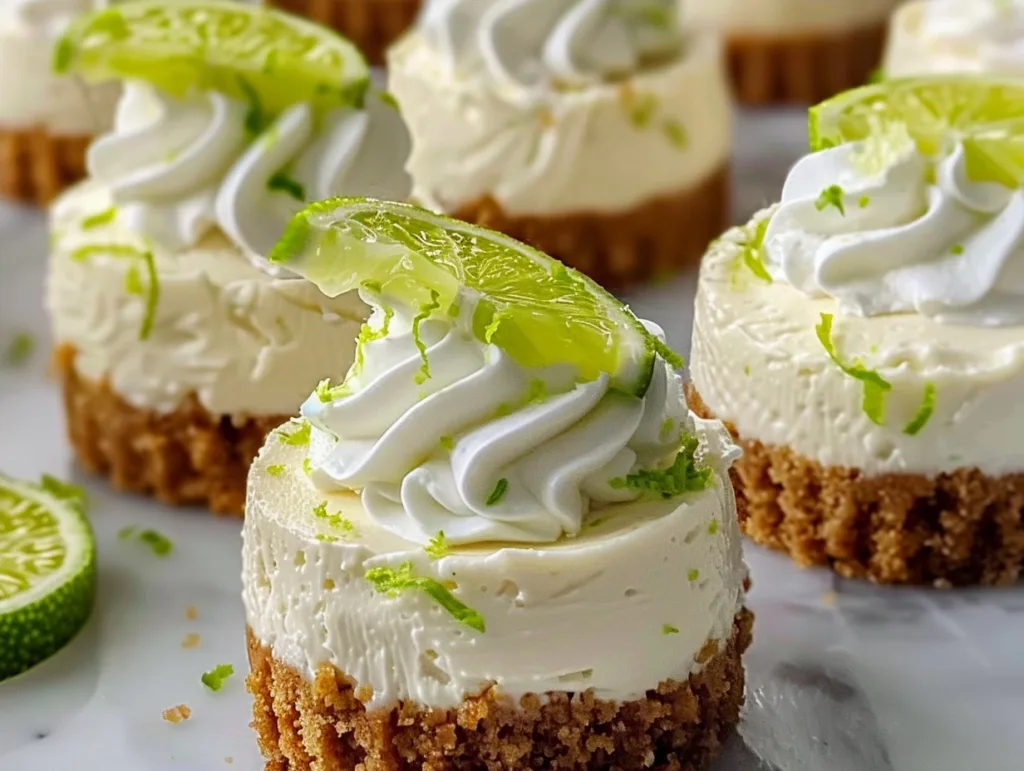
Once chilled and perfectly set, it’s time for the grand finale! Gently remove each mini cheesecake from the muffin tin by lifting the edges of the liner. Place them on a serving platter. Now, get creative with your garnishes! Pipe a swirl of extra whipped topping onto each cheesecake. Sprinkle with a little more key lime zest for a pop of color and aroma. You can even add a thin slice of lime for an elegant touch. These little beauties are ready to impress!
Expert Pro Tips for the Ultimate No-Bake Mini Key Lime Cheesecakes
While these cheesecakes are straightforward, a few insider tips can elevate them from delicious to absolutely divine. These small adjustments ensure a consistently beautiful and incredibly tasty outcome every single time.
- Room Temperature is Key: Ensure your cream cheese is truly at room temperature. This is non-negotiable for achieving a perfectly smooth, lump-free filling. Cold cream cheese will lead to a grainy texture.
- Don’t Overmix the Filling: Once you add the whipped topping, fold it in gently. Overmixing can deflate the airiness, resulting in a denser cheesecake.
- Press the Crust Firmly: A tightly packed crust prevents it from crumbling when you remove or eat the cheesecake. Use a flat-bottomed glass or measuring cup to get a nice, even surface.
- Chill Thoroughly: Resist the urge to cut the chill time short! Proper chilling time allows the fats to solidify, giving you that characteristic cheesecake texture and making them easy to handle.
- Use Fresh Key Lime Juice if Possible: While good quality bottled juice works, fresh key lime juice offers a superior brightness and authentic flavor that makes a significant difference. Zest those limes!
- Stabilize Homemade Whipped Cream: If opting for homemade whipped cream instead of a stabilized topping, whip heavy cream with a bit of sugar and a touch of cornstarch or gelatin to ensure it holds its shape well for the filling.
Delicious Variations & Substitutions
These No Bake Mini Key Lime Cheesecakes are fantastic as is, but why not have some fun and explore different flavor avenues? Here are some ideas to customize them to your heart’s content.
- Spicy Kick: Add a pinch of cayenne pepper or a tiny bit of finely minced jalapeño (seeds removed) to the cream cheese mixture for a surprising spicy-sweet contrast.
- Berry Bliss: Swirl a tablespoon of raspberry or strawberry puree into the cheesecake filling before adding the whipped topping, or top with fresh berries.
- Cookie Crust Swap: Instead of graham crackers, try using crushed vanilla wafers, shortbread cookies, or even gingersnap cookies for a different crust flavor profile.
- Gluten-Free Delight: As mentioned, use gluten-free graham crackers or even almond flour mixed with a little butter and sweetener for a grain-free crust option. Ensure your whipped topping is also gluten-free.
- Dairy-Free Option: Use dairy-free cream cheese substitutes (ensure they are firm enough) and a dairy-free whipped topping like coconut cream. The texture might vary slightly, but the flavor will still be delightful.
- Lemon Twist: If key limes are hard to find, regular lime juice and zest can be used, or even lemon juice and zest for a classic lemon cheesecake experience.
What to Serve with Your Mini Key Lime Cheesecakes
These delightful mini cheesecakes are truly a standalone star, but they also pair beautifully with a few complementary treats. Serve them as a refreshing end to a meal, or as a sweet pick-me-up any time of day.
- Fresh Berries: A simple side of fresh strawberries, blueberries, or raspberries adds color and a burst of natural sweetness.
- Whipped Cream: Extra dollops of sweetened whipped cream are always a welcome addition.
- A Light Iced Tea or Lemonade: The perfect non-alcoholic beverage to complement the zesty lime flavor.
- A Small Scoop of Coconut Ice Cream: For an extra tropical, decadent treat.
- Melon Slices: A refreshing slice of cantaloupe or honeydew melon can offer a palate-cleansing contrast.
Storage & Reheating Instructions
Proper storage ensures your No-Bake Mini Key Lime Cheesecakes stay fresh and delicious. Since they are no-bake, they require refrigeration.
- Refrigerator Storage: Store leftover mini cheesecakes in an airtight container in the refrigerator for up to 3-4 days. If you have room, you can keep them in their muffin tin lined with plastic wrap, or arrange them on a plate and cover tightly with plastic wrap.
- Freezer Storage: While best fresh, they can be frozen. Freeze them on a baking sheet until solid, then transfer to a freezer-safe airtight container or zip-top bag for up to 1 month. Thaw overnight in the refrigerator before serving. Note that the texture might be slightly softer after freezing.
- Reheating: These are served cold, so no reheating is necessary! Simply take them out of the refrigerator about 15-20 minutes before serving for the perfect creamy consistency, especially if they’ve been chilled for a long time.
Frequently Asked Questions (FAQs)
Can I make these No Bake Mini Key Lime Cheesecakes ahead of time?
Yes, absolutely! In fact, making them ahead is highly recommended. They need at least 4 hours to chill and set properly, making them ideal for preparing the day before a party or gathering. They’ll be perfectly firm and flavorful.
Can I freeze these mini cheesecakes?
You sure can! For the best quality, freeze them after they’re fully set but before garnishing. Place them on a baking sheet until frozen solid, then transfer to an airtight container. Thaw them in the refrigerator overnight. Keep in mind that the texture might soften slightly after thawing.
What’s the best way to get really smooth cheesecake filling?
The secret is starting with softened, room-temperature cream cheese. Beat it thoroughly until completely smooth before adding other ingredients. Sifting your powdered sugar also prevents those pesky little lumps, ensuring a velvety finish.
How do I prevent the crust from being crumbly?
Press the graham cracker crust mixture firmly into the liner. The butter acts as a binder, so making sure all the crumbs are moistened and then packing them tightly will create a solid base that holds together beautifully.
Can I make these No Bake Mini Key Lime Cheesecakes gluten-free?
Definitely! Simply substitute the graham crackers with your favorite certified gluten-free graham crackers or even crushed gluten-free vanilla cookies. Ensure all other ingredients, like your whipped topping, are also gluten-free.
How many days can no-bake cheesecake last in the fridge?
No-bake cheesecakes typically last for about 3 to 4 days when stored properly in an airtight container in the refrigerator. Beyond that, they may start to lose their optimal texture.
Final Thoughts on These Zesty Little Treasures
There you have it – your new go-to recipe for irresistible No-Bake Mini Key Lime Cheesecakes! These little bites of heaven are more than just a dessert; they’re an experience. They bring that bright, sunny feeling of a tropical getaway right into your kitchen, no passport required.
Imagine the smiles on your loved ones’ faces as they savor that perfect balance of creamy, tangy, and sweet. They’re simple enough for a spontaneous craving but special enough for any celebration. So go ahead, gather your ingredients, and whip up a batch. You deserve this little taste of sunshine.
Don’t forget to share your creations! Pin this recipe to your Pinterest board for future sweet cravings, and share it on Facebook with your friends who need a little bit of easy deliciousness in their lives. We’d absolutely love to see your photos and hear your thoughts in the comments below!
Happy baking (or rather, no-baking)! This recipe is a keeper, and we hope it brings as much joy to your home as it does to ours.
Print
No Bake Mini Key Lime Cheesecakes
- Total Time: 260
- Yield: 12 mini cheesecakes
- Diet: Vegetarian
Description
Tiny pockets of sunshine in every bite, these no-bake mini key lime cheesecakes are tangy, sweet, and incredibly easy to make. Perfect for any occasion, they offer a creamy cheesecake filling with a zesty key lime twist on top of a buttery graham cracker crust, all without needing an oven.
Ingredients
1/2 cup all-purpose flour
1/4 cup sugar (for crust)
1/2 cup melted butter
1 cup graham cracker crumbs
8 oz (about 2 cups) cream cheese, softened
1/2 cup powdered sugar
1 teaspoon vanilla extract
Zest of 1 key lime
2 tablespoons freshly squeezed key lime juice
Mini dessert cups or molds
Instructions
In a small bowl, mix graham cracker crumbs, flour, melted butter, and 1/4 cup sugar. Press this mixture into the bottom of each mini cup to form the crust.
In a separate bowl, beat cream cheese, powdered sugar, vanilla extract, key lime zest, and key lime juice until smooth and creamy.
Spoon or pipette the cream cheese filling into each prepared mini cup, filling it about 3/4 full.
Refrigerate for at least 4 hours, but overnight is best, to allow the filling to set completely.
Garnish with a lime zest swirl or a sprinkle of powdered sugar before serving.
Notes
Chill time is crucial for setting the cheesecakes. Make sure the cream cheese is well softened for a smooth filling.
These can be frozen for up to 2 months; thaw in the fridge before serving.
For a gluten-free version, use gluten-free graham cracker crumbs.
- Prep Time: 20
- Category: Desserts & Sweets
- Method: Refrigeration / No-bake
- Cuisine: American