
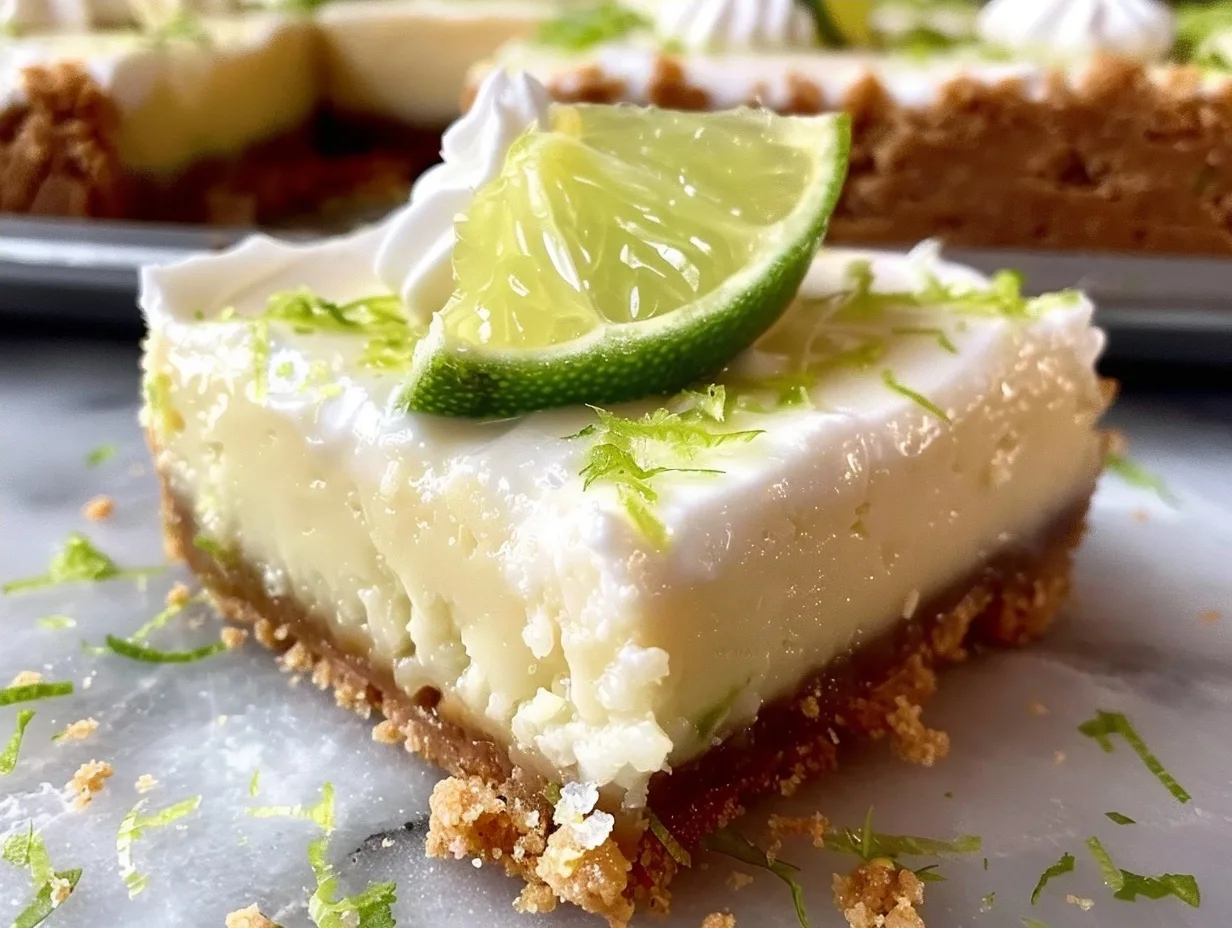
Key Lime Pie Bars deliver that bright, tropical flavor everyone adores in a perfectly portioned, easy-to-handle bar.
| Prep Time: | 15 minutes |
|---|---|
| Cook Time: | 20 minutes |
| Total Time: | 35 minutes (plus chilling time) |
| Servings: | 16-20 bars |
| Difficulty: | Easy |
| Cuisine: | American |
Oh, those sunny days! Whenever I think about Key Lime Pie Bars, my mind immediately drifts back to our family vacations down South. The air would be thick with the scent of salt, and after a long day at the beach, my little ones would always beg for something sweet and tart. This recipe became our go-to because it’s just so darn easy to whip up, even after a hectic day wrangling kids and sand toys. It captures all that tangy, creamy goodness of a traditional key lime pie but in a format that’s perfect for little hands, busy lunchboxes, and even impromptu backyard picnics. It’s more than just a dessert; it’s a box of sunshine that instantly lifts everyone’s spirits, turning a regular Tuesday into a mini-celebration.
Why My Family Loves This Recipe
- Bright & Tangy Flavor: It’s like a little slice of a tropical vacation, bursting with that signature sweet-tart lime taste that kids and grown-ups alike can’t resist.
- Perfectly Portioned: These bars are so easy to grab and go, making them ideal for packed lunches or quick afternoon snacks without a fuss.
- Simple to Make: Even on the busiest weeknights, this recipe comes together quickly, bringing smiles and happy bellies with minimal stress.
- Nostalgic Comfort: Each bite brings back warm memories of family trips and carefree summer days, wrapping us in a cozy blanket of nostalgia.
- Crowd Pleaser: Whether it’s a family gathering, a school bake sale, or just a treat for the family, these bars are always a guaranteed hit.
The Stars of the Show: Ingredients for Key Lime Pie Bars
Gathering the right ingredients is the first step to creating those delicious Key Lime Pie Bars. Here’s what you’ll need for this ray of sunshine in a pan:
| Quantity | Ingredient | Notes & Alternatives |
|---|---|---|
| 1 ½ cups | Graham cracker crumbs | About 10-12 full graham crackers, crushed. Can substitute with digestive biscuits. |
| ¼ cup | Granulated sugar | For the crust. Adjust to your sweetness preference. |
| 6 tablespoons | Unsalted butter, melted | Makes the crust come together beautifully. |
| 8 ounces | Fat-free cream cheese, softened | Ensure it’s at room temperature for smooth mixing. 1/3 fat cream cheese also works. |
| 1 (14-ounce) can | Fat-free sweetened condensed milk | The secret to a creamy, sweet filling. Make sure it’s the sweetened kind! |
| ½ cup | Lime juice | Freshly squeezed is best for maximum flavor, but good quality bottled lime juice works too. |
| 1 teaspoon | Lime zest | Adds an extra punch of lime aroma and flavor. |
Sunshine in Every Slice: How to Make Key Lime Pie Bars
Putting these bars together is a breeze, perfect for even the busiest of weeks. Follow these simple steps, and you’ll have a delightful treat!
Phase 1: Crafting the Perfect Crust
- Preheat the Oven: Before we dive into the fun of creating these Key Lime Pie Bars, let’s get our oven preheated to 350°F (175°C). This step is crucial because you want your crust to set perfectly. Starting right makes a world of difference in your dessert outcome!
- Make the Crust Mixture: Now, let’s whip up that delicious graham cracker crust. In a medium bowl, mix the graham cracker crumbs, ¼ cup sugar, and 6 tablespoons of melted butter until everything is evenly moistened. I love using my hands here; it feels rewarding! Just make sure the mixture is combined like wet sand.
- Press into Pan: Grab an 8 or 9-inch square baking pan and line it with parchment paper, leaving some overhang on the sides. This makes lifting the bars out later so much easier! Press the crumb mixture firmly and evenly into the bottom of the lined pan. You want it packed nice and tight for a sturdy base that won’t crumble.
- Bake the Crust: Pop the crust into your preheated oven and bake for about 10 minutes, or until it’s lightly golden brown. This quick baking helps solidify the crust, giving it that perfect crunch. Once it’s fragrant and golden, take it out and let it cool completely on a wire rack before adding the filling. Patience is key; don’t rush this part for the best texture!
Phase 2: Whipping Up the Creamy Filling
- Prepare the Filling Base: While the crust cools, let’s make that dreamy filling! In a medium bowl, beat the 8 ounces of softened fat-free cream cheese with an electric mixer until it’s wonderfully smooth and free of lumps. Ensure your cream cheese is truly at room temperature for the best results.
- Combine Wet Ingredients: Gradually beat in the 1 (14 ounce) can of fat-free sweetened condensed milk. Then, add in the ½ cup of lime juice and 1 teaspoon of lime zest. Mix on low speed until everything is just combined and looks beautifully creamy and uniform. Be careful not to overmix at this stage.
Phase 3: The Final Bake and Chill
- Pour and Assemble: It’s time for the grand assembly! Pour that luscious lime filling over the cooled graham cracker crust. Gently spread it out evenly using a spatula to ensure a smooth, professional-looking top layer.
- Bake the Bars: Carefully place the pan back into your 350°F (175°C) oven and bake for another 10-12 minutes. This short bake helps set the filling just enough, so it won’t be liquid, ensuring every bite is as divine as the last. The center might still be slightly soft, which is okay.
- Cool Down: After baking, remove the pan from the oven and let your Key Lime Pie Bars cool completely at room temperature on a wire rack. This might take about an hour.
- Chill to Perfection: Once cooled, cover the pan loosely with plastic wrap and pop it in the refrigerator for at least 2-3 hours, or preferably longer. Chilling not only allows the flavors to meld beautifully but also firms up the filling, making slicing clean and easy. Patience here really pays off for that perfect texture!
- Slice and Enjoy: Once thoroughly chilled, use the parchment paper overhang to lift the entire block out of the pan. Place it on a cutting board and slice into bars using a sharp knife. Wipe the knife clean between cuts for the neatest edges.
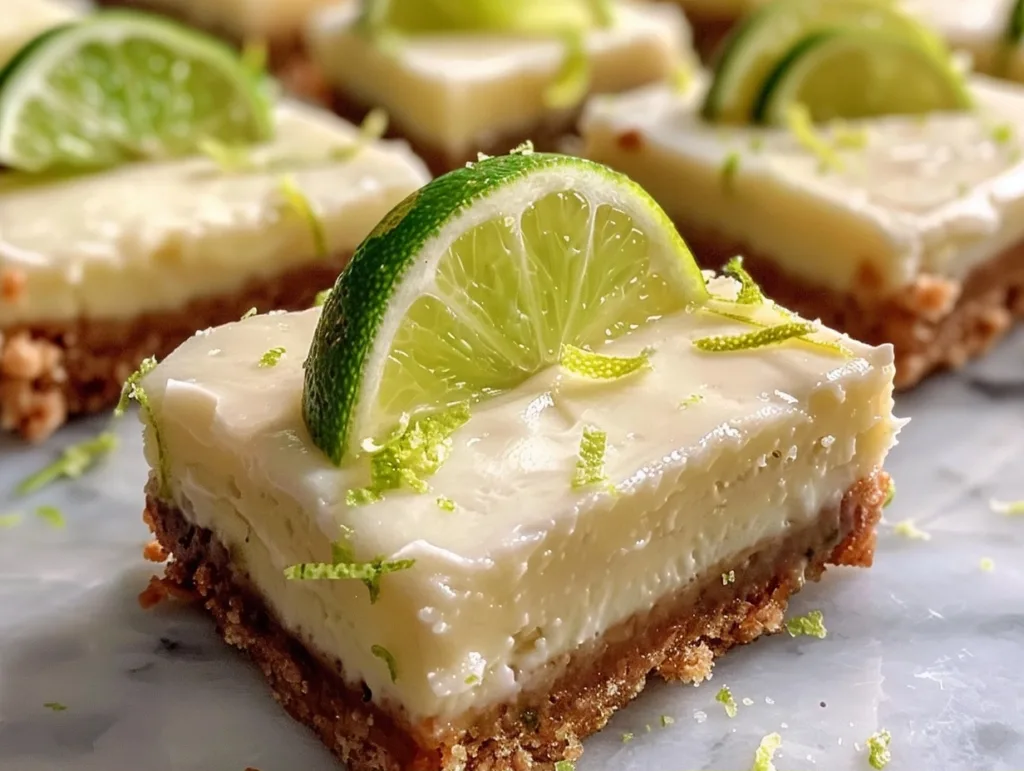
Mom Tips & Hacks for Key Lime Pie Bars
As a busy mom, I’m always looking for ways to make life a little easier, and these bars are fantastic for that. For meal prep, you can make the crust a day in advance and store it at room temperature in the covered pan. The bars themselves are also freezer-friendly; I love wrapping individual bars tightly in plastic wrap and then placing them in a freezer bag. They thaw beautifully overnight in the fridge, making them a perfect grab-and-go treat for school lunches or a spontaneous after-school snack. If you have picky eaters who aren’t big on zest, you can sometimes skip it or reduce it slightly, though it does add a wonderful brightness to the flavor. These bars also hold up well in a lunchbox, especially if you pack them with a small ice pack on warmer days.
Easy Variations for Your Key Lime Pie Bars
While the classic Key Lime Pie Bar is hard to beat, there are plenty of ways to switch things up! For a slightly healthier twist, you could try using a pre-made graham cracker crust made with whole wheat crackers and less sugar, or even experiment with a shortbread cookie crust. If you want to add a bit more protein, a dollop of vanilla Greek yogurt served alongside or even folded gently into the filling could be delightful, though it might alter the texture slightly. For an extra pop of flavor, consider adding a handful of fresh berries, like raspberries or blueberries, to the filling before baking, or topping the chilled bars with fresh fruit. If you’re aiming for a dairy-free or vegan version, there are excellent vegan cream cheese and sweetened condensed coconut milk alternatives available that work wonderfully in this recipe.
What to Serve with Your Sunshine Bars
These Key Lime Pie Bars are bright and refreshing on their own, but they also pair wonderfully with a few simple accompaniments. For a family meal, consider serving them after a light grilled chicken or fish dish. Kid-friendly pairings could include a simple side salad with a light vinaigrette or some fresh fruit slices like melon or strawberries. If you’re looking for another easy dessert to round out a picnic or potluck spread, a simple berry crumble or some classic sugar cookies would be lovely. The tartness of the lime bars also wonderfully balances out richer Southern comfort food dishes, making them a versatile sweet treat.
Storing Your Delicious Key Lime Pie Bars
Keeping these bars fresh is simple, ensuring you can enjoy that taste of sunshine for days. Store leftover Key Lime Pie Bars in an airtight container in the refrigerator for up to 4 days. They stay wonderfully firm and flavorful when chilled. For longer storage, you can freeze them; wrap individual bars well in plastic wrap, then place them in a freezer-safe bag or container. They’ll keep in the freezer for up to 2 months. To reheat or serve, simply thaw them overnight in the refrigerator. I often find they’re best served cold straight from the fridge, especially on a warm day, making reheating unnecessary for busy moms on the go.
Frequently Asked Questions about Key Lime Pie Bars
Can I use regular limes instead of Key Limes?
Yes, you can absolutely use regular Persian limes if Key limes are unavailable. The flavor will be slightly different but still wonderfully tart and delicious. Use the same quantity of juice measured from regular limes.
How do I know when the Key Lime Pie Bars are done baking?
The bars are done when the edges of the filling are set and slightly puffed, and the center is mostly firm but may still have a very slight jiggle. Overbaking can cause the filling to crack, so err on the side of slightly underdone. They will continue to set as they cool and chill.
My filling is cracking, what did I do wrong?
Filling cracks often occur from overbaking or a significant temperature change. Ensure you are baking at the correct temperature and avoid overbaking; the center should be just set. Cooling the bars slowly at room temperature before refrigerating can also help prevent cracks.
Can I make Key Lime Pie Bars ahead of time?
Yes, these bars are perfect for making ahead. You can prepare them a day or two in advance and store them in the refrigerator. They actually taste even better when the flavors have had time to meld together.
What is the best way to cut Key Lime Pie Bars?
For the cleanest cuts, ensure the bars are well-chilled. Use a sharp knife and wipe the blade clean with a damp cloth between each cut. Running the knife under hot water and drying it before each slice can also help create beautiful, pristine edges.
Enjoy a Slice of Sunshine Anytime
Key Lime Pie Bars are more than just a simple dessert; they’re a little box of happiness ready to brighten any day. With their perfectly balanced sweet and tart flavors, easy-to-manage bar form, and comforting creamy texture, it’s no wonder they’ve become a family favorite. This recipe offers a delightful way to capture that beloved Key Lime Pie taste without the fuss of a traditional pie crust. Don’t hesitate to try these Key Lime Pie Bars soon – they’re guaranteed to become a staple in your home, bringing smiles and sunshine with every bite!
Print
Key Lime Pie Bars:
- Total Time: 140
- Yield: 16-20 bars
- Diet: Vegetarian
Description
Grab-and-go tropical treats combining a graham cracker crust, tangy lime filling, and whipped topping for a portable key lime pie experience. Ready in under an hour with minimal effort.
Ingredients
1½ cups graham cracker crumbs
¼ cup granulated sugar (for crust)
½ cup unsalted butter (melted)
4 egg whites
¾ cup key lime juice
2 tablespoons key lime zest
1 can (14 oz) sweetened condensed milk
2 egg yolks
6 tablespoons unsalted butter (for filling)
⅓ cup graham cracker crumbs (for topping)
1 tablespoon key lime juice (for topping)
Instructions
Preheat oven to 350°F (175°C). Press graham cracker crumbs, sugar, and melted butter into 13×9″ pan lined with parchment paper
Bake crust for 7 minutes. Cool completely
Whisk egg whites in bowl until stiff peaks form
In separate bowl, blend lime juice, lime zest, condensed milk, egg yolks, and 6 tbsp butter until smooth
Fold egg whites into lime mixture until no streaks remain
Pour over cooled crust. Evenly distribute graham cracker topping mixed with 1 tbsp lime juice
Bake 20 minutes or until lightly golden. Cool completely
Chill 4+ hours before cutting into 16-20 bars
Notes
Use parchment paper for clean removal
If unavailable, substitute digestives biscuits
Best stored chilled in airtight container
Top bars with lime zest before serving for extra flavor
Chilling helps firm texture for clean slicing
- Prep Time: 20
- Cook Time: 27
- Method: Baking
- Cuisine: American